Wednesday, 29 February 2012

Is It Friday Yet???

Don't read that title in a whiny voice, more like a "oh, my word this week is a hot mess" kind-of-tone! It really feels like it should be Friday. This momma is ready to put my feet up and relax a bit. Here's some pics of the week thus far:
See that thing in the cup holder? That would be my keys...nice and safe, locked up in the car...yay me!

I had to pull Bill out of class during a 9 hour test no less to come to my rescue. We got my keys but Jack missed his 2 year check up and both boys thought it required a full meltdown... I have no idea why.

Jack is going through a growth spurt and the little man has turned into a bottomless pit! He has also taken a liking to my iPhone and today we thought he purchased $140 worth of apps...nope our credit card number was stolen. Lovely huh? Thankfully Bill is a finance ninja and caught it before anything really huge happened and new cards with new numbers are on their way.

I scored 3 very unique frames that will get a major makeover and hopefully turn a profit in the Etsy shop this month. The picture on the left creeps me out but thankfully I have a friend who has taken a liking to him and I'm more than happy to give him a new home. The group picture in the long frame is adorable, it  is of a nursing school graduating class and the faces are hilarious. I'll have to take a close up for you and tell you the whole little screen-write I came up with for it ;) Think Grey's Anatomy meets Gossip Girls ;) I cant bare to toss the print, so I will find them a new home as well. 

It rained and poured and stormed all day today. I was able to get quite a bit of fabric cutting done. And I tell myself that it isn't dreary outside, it's just really cozy inside. My SIL gave that quote to me and I'm desperately trying to hang on to it. Come on Spring!

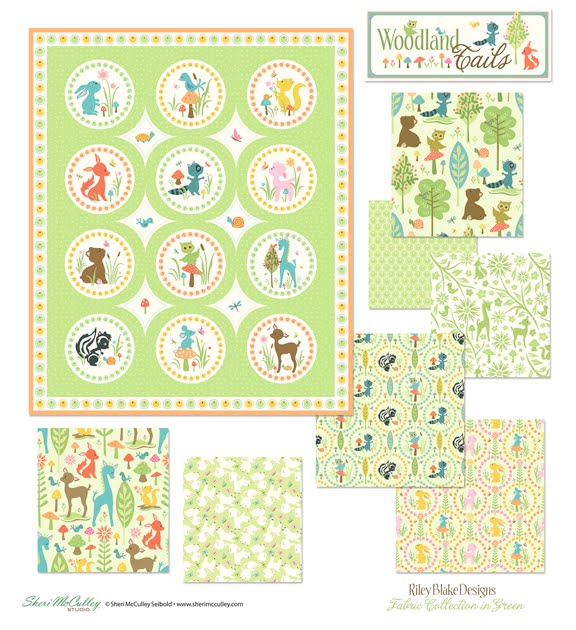
By the end of the month I should have 3 quilts up in the shop as well! 

Tomorrow I am headed to the Botanical Gardens with the tots, the weather is finally supposed to warm up and I'll be taking full advantage!

Giveaway Results!


This has been a great first month for this little blog! With almost 3,000 page-views, a handful of sales in the Etsy shop, and several new followers, I couldn't be more pleased! Thank y'all for the encouragement and support! My hopes are that this blog will only get better and better!

Now... to announce the winner of my first giveaway! Using the generator at random.org, number 14 was selected. See picture below!

My 14th follower is Matthews Family! Congrats! Your loot will be in the mail :)

Didn't win? Don't worry! The March giveaway will be up tomorrow! Happy Leap Year :)

Tuesday, 28 February 2012

Ladybugs

Today is National Pancake Day!
To celebrate you could get free pancakes at IHOP or you could make some fun ones at home...and of course I decided to make some fun ones at home! We made some Ladybug Pancakes:
These cute pancakes are simple to make:
First mix up your pancake mix, homemade or boxed.  Mix it well so there are no lumps.  I separated my batter into two different bowls for red and brown (I added red food coloring and cocoa powder to make the colors). Once your colored batter is fully mixed then put into a squeeze bottle.


On a skillet or griddle (on low heat) draw out the circle/oval for the lady bug body in red batter. Draw the line down the middle in your brown batter. Outline the head and antennae in the brown batter and then put your ladybug spots on the body.  Let it cook until all nice and bubbly.  Fill in the head with the brown batter and the body with the red batter.  Let the entire pancake cook until bubbly all over.  Gently flip over and let the pancake fully cook on the other side.  Add mini chocolate chips for the eyes.  I added my chocolate chips while the pancake was still on the skillet so they melted a little bit. 


Since Eliana's birthday is coming up (!!!!) I am just remembering how fun her last birthday party was. Last year Eliana loved ladybugs and asked for a ladybug birthday party and all. 


These are some pics of what I did last year for her Ladybug birthday party: ((excuse the quality of the pictures.. I only had a cell phone camera at that time since my camera had just broken!))

First we blew up all red and black balloons and put them everywhere. On some of the red balloons we used a black sharpie and drew spots on them to look like ladybugs.  We also used red and black streamers all over the house :) But the food was the best part:
Ladybug Cake balls inspired by Bakerella
To make these ladybug cake balls I made red velvet cake balls and smooshed them with my hands into an oval shape. Coated them with red candy melts and used dark chocolate candy melts to put the line and spots on the body.  I used a junior mint candy for the head ("glued" with candy melts) and attached two edible candy eyes on the head.
Ladybug M&Ms
Red M&M's + Black foodwriter = Ladybug M&M's
To make these Ladybug M&M's you will need a lot of red M&Ms and a black food safe marker. Simply color one end of the M&M black for the head, draw a line down the middle and put two to four dots on either side of the line. Simple as that! (super time consuming if you need a lot of M&Ms like I did... so enlist help or do it before the party. Not the day of the party. Don't be like me haha)
Ladybugs relaxing on some red velvet cupcakes and green buttercream frosting
Ladybug treat bags can be found here 
Ladybug Fun!
The 3 year old ladybug herself holding a ladybug cakeball! :)
Ladybug costume can be found here (not incl. wings)
Eliana still loves her lady bug costume :) That was such a fun party. I can't believe that was almost a year ago! Eliana will be four in less than a month! Time to plan another party! :)

National Pancake Day

Happy National Pancake Day y'all! If you head on down to IHOP today they are giving away free short stacks! You can't beat that kind of deal! All donations go to Children's Miracle Network Hospital another good reason to eat pancakes! I headed on over for lunch with my SIL, surprisingly the place was not busy at all. The boys had a blast and us mommas didn't have to worry about what's for lunch :) Plus to top it off the little kiddie toy is seed paper to take home and plant. Love it!

Monday, 27 February 2012

A twist to it

Do you love to eat (or drink) bubur cha cha? I do! *wink* Bubur cha cha is actually a Nyonya dessert.

This was actually a back-dated post. You know, just managed to sort my photos in the digital camera and transfered and arranged in my pc. So remember this photo of bubur cha cha and before it "aged", I better post it now otherwise I will forget about it again.

Had some leftover glutinous rice flour (pulut) from tang yuen festival, so I used it up for bubur cha cha! Used the normal basic ingredients i.e. coconut milk, sweet potatoes, taro, sago (tapioca pearls)and pandan leaves, and the twist is the coloured rice flour. Added the sweet potatoes, taro and pandan leaves into boiling water. Once the potatoes and taro are soften, you add in the rice flour and sago. Let it cook for about 20 minutes in low heat. Lastly, add sugar to taste and mix well. You can have it chill or hot! Yummy dessert!


What do you add into your bubur cha cha???

Woodland Tails, Sew What?

Sew what? Sew lots and lots! Sew for a boy, sew for a girl, and even sew for yourself.

Here are a few photos of the Woodland Tails cotton fabric collection with RBD. It is better than the photos show, it is perfect. It is just the thing for that hip and all natural baby and kid decor that is all the rage. It’s even cool for us older youngins too. I am hoping to eventually get a bag made from a few of the prints in this collection. Maybe I’ll even make a bag for each month of the year. The panel was designed with all 12 characters, and it would surely be cute as 12 different carry-all bags with an animal on the front of each and complimentary prints surrounding it.
The sample photos shown below are compliments of Riley Blake Design (not my creations) and I want to share them with you to inspire. They are of a super neat carry-all bag, a bib for tots and a lovely quilt showcasing the Woodland panel in blues and sweet soft blocks.
(photo above) darling bag, compliments of RBD

(photo above) bib, pre-cuts and beautiful quilt, compliments of RBD

Here are the Woodland Tails fabrics available through RBD. For further information and a location map of quilt shops near you, go here to learn more and see other fabrics from RBD including my ModTod collection, also available in stores now.


Sweet, petite and pretty neat! Something for girls, something for boys, something for us all!

Jam & Brown Sugar French Toast Casserole


I love this picture. Not because it's the best shot of this dish but because Jack is staring me down so intently, binky out, ready to pounce the second I look away. It should speak volumes for this recipe. My little guy was grabbing handfuls off of my plate at brunch today, he simply couldn't get enough. 

This is my take on Southern Living's Blackberry French Toast recipe from back in 2009. I've made a few changes and mine doesn't have to sit overnight but if you want the original recipe go here.

Jam & Brown Sugar French Toast Casserole
1 loaf of french bread cut into bite size pieces (the big kind, sold in the paper bag in the bakery)
1 cup jam (my kids like black raspberry, but any kind will work)
1 package of cream cheese (cut into the tiniest cubes you can do)
4 eggs
2 and 1/2 cups half-n-half
1 heaping teaspoon cinnamon
2 teaspoons vanilla
1/4 cup loosely scooped brown sugar

Preheat the oven to 375 degrees. In a glass measuring cup heat your jam in the microwave until melted and smooth and set aside. Whisk together the eggs, half-n-half, cinnamon and vanilla in a bowl. Layer half of the french bread pieces into a buttered casserole dish. Pour a quarter of the egg mixture onto the bread in the dish and then drizzle the melted jam and evenly distribute the cream cheese over top. Add a top layer of bread pieces and pour the remaining egg mixture evenly over top. With your hand crumble the brown sugar on top of the casserole, cover with foil and set in the oven for 30 minutes. Then uncover and bake for an additional 10-15 minutes. Serve with maple syrup or eat alone. The original recipe was too sweet for us and even with my changes we eat this alone although I'm sure my brother and Buddy the elf would pour it on ;)

Enjoy!

Sunday, 26 February 2012

My morning drink

I have a habit of taking my supplements early in the morning in empty stomach. Well, people said it is better for absorption, so I follow what people say loh.

Used to take some enzyme drinks but since we have no stock for a month, hubby bought home this health fruit drink last week. Have been drinking for a week now. Taste wise, it is better than the enzyme drink we had. Health wise, the enzyme should be better since the content and benefit are more, but if no "prawns", "fish" also can. Cannot be so demanding right??? I named it my morning elixir. Lol!


This is the first bottle. Hubby bought 2 bottles home, so it would take about a month for both of us (I think).

Saturday, 25 February 2012

Saturday Night Meanderings

It's so hard to blog when my momma is here! There's too much laughter, shopping, adventures and kid wrangling going on that I don't have a moment to snap a picture or come up with a thought to share! I do love every second of it though! Sadly she heads home tomorrow and life will return to normal. I have some fun posts for you, and one specifically that I'll be asking for some major insight on, so stay tuned.

Tonight I realized I didn't share a very special item in our house with y'all in the last post. For the most part any decoration in our home has history to it and probably a good story to go along. This is one I wanted to share with you tonight.


The bottom right is my sweet husband, taken back in his USNA days, we really do need to update it. Such a baby he was! But what you see here is 4 generations of men in a row who have served their country with honor. Bill's parents gave it to him as a gift and I couldn't cherish it more. I love that this is part of my children's story.

Friday, 24 February 2012

After Dawn

It took me about a month to sort and save my CNY photos from my camera into pc. A lot of excuses but lazy is the main one for my procrastination. Lol!

I always love to take photographs of food, flowers and scenery besides my two growing kids. Those are the memories that we can treasure as time will not wait for any of us. So, while reminiscing those photographs we taken during CNY, I want to share with you this beautiful photo. Supposed to take the first light of the CNY Eve, but too busy with 3 kids in the car, so I missed out on the dawn. But it was still beautiful to look in the morning sky. Taken slightly before 7am on 22 January. Don't you feel alive looking at the morning light???


Have a great weekend, everyone!

Out of the Forest and into the Quilt Shops


My cotton fabric samples just arrived from the Woodland Tails collection I did with Riley Blake Designs. I think they are perfect and look just like my original art. The colors are fantastic, the fabric is wonderful. I am delighted.
I am showing you the three colorways here, but will show you the actual fabrics as soon as I have a chance to take photos this weekend, and will post that before the weekend is over.
Just to review, or if you are new to the Woodland Tails collection in fabric, here are the three colorways, in blue, green and pink. Riley Blake made fabrics in this collection into cotton, some flannel and even a few prints into laminates and ribbon. To learn more about where to find Woodland Tails in fabric and what is available go here to the RBD site.

I think we might need to have another fat quarter give away with some of these prints, maybe once I get my member count up to 120. That’s less than 15 peeps to join, super simple, right? :) I will let you know about that also in the next posting with the photographs of the fabric. You can always comment now, but I’ll let you know where/when to comment to be in the drawing to win the fat quarter set.

I am also playing with the idea of having embroidery patterns available of the Woodland Tails animals and many other pieces of art from various collections I have developed. I would love to hear thoughts from any of you regarding this idea. They would not likely be kits to buy with pieces to assemble; rather a pdf file to purchase and download to create for your own purpose.

Thursday, 23 February 2012

Oatmeal Energy Bites

If you know me well, you know not to mess with me when I'm hungry. I go from sorta hungry to "oh-my-goodness-i-feel-fatigue-and-will-drop-over-and-die-now-unless-you-can-feed-me-NOW" in a matter of minutes/seconds. No joke. So to all my  family members or friends that have seen me like that...sorry.

My hunger always catches me by surprise, even though I've always been like this and this is nothing new. I'm always snacking on things so that I don't get to that hunger crazy point.  I do try to snack healthy (baby carrots, and raw bell peppers for ex.), but I tend to go to the crackers, and cookies since they are so much more tastier..so lately I have been looking for a snack that I could eat between meals and would be somewhat filling and healthy, taste good and could curb my hunger craziness (I know a lot of criteria for a snack). But I found IT. Energy Bites. Oatmeal Energy Bites of goodness. No bake, super easy and I love them:

Yes.. I realize lots of bites going on over here (date bites, oatmeal energy bites..) But somehow everything to me always tastes better when shaped into a ball. Take cake balls for instance. Way better than cake. 

When I found this recipe I first knew I had to try it immediately, and second I knew I was going to love it. Now I make a batch of Oatmeal Energy Bites about once a week... we are sort of addicted to them in our household and many friends have asked me to share these addicting bites so here they are!


Ingredients:
*1 cup dry oatmeal (I used old-fashioned style oats, but quick cooking oats would work too)
*1 cup toasted coconut flakes (toasting is optional.. but recommended by yours truly)
*1/2 cup chocolate chips
*1/2 cup nut butter (soy butter, sunbutter, almond butter, peanut butter-- depends what you can have)
*1/2 cup ground flaxseed
*1/3 cup honey
*1 tsp. vanilla

Mix all the ingredients together until thoroughly mixed.  Put the mixture in the refrigerator for a half hour to chill.  Then you can roll the mixture into balls, or mold them into bars, or whatever shape you want.  Store them in an airtight container and keep them in the refrigerator for up to one week. Super easy. Super quick.
Depending on how big/small you make the bites this recipe will yield different amounts of Oatmeal Energy Bites. The last batch I made 24.
(recipe from gimme some oven! adapted from Smashed Peas and Carrots)

With my busy schedule I don't always have the time to roll the bites after waiting for them to chill.  For example the last batch I made I didn't have time because I had to get to my night classes (from 4-9pm! fun fun!).  So I mixed all the ingredients together before I left for class, put them in an airtight container and let it chill over night.  I rolled the bites the next morning.

Sometimes I find if you take the desired amount of mixture and squish it into your palm like a stress reliever ball it does two things for you: 1. it  de-stresses you. 2. the bites come together easier ;)

Making Our House Our Home

*** WE'VE MADE A LOT OF CHANGES SINCE THIS POST***
CHECK OUT THESE LINKS TO SEE THE NEWEST REVAMPS
LINK 1
LINK 2
LINK 3
First off, this is going to be a ridiculously long post filled with pictures. Sorry about that, but hopefully at the end you'll feel like you got the full tour! I realized last week that our style after 5 baby years of marriage is still evolving and thankfully these rental houses give me a chance to try ideas out, and if it's not the greatest, well I can try again in 3 years. That's the fun part of moving for me, a new place, a new space, another chance to try again. So here is what we've done to this house, we still need to work on the master, it's a hot mess but other than that we are done!

BEFORE:
Entryway


Right-side of the living room

Living Room

Left side of the living room

Dining Room

Kitchen

Kitchen

Guest Room

Boy's room, it was purple but we painted it the day we moved in :)


Master

Master

AFTER:
Laundry Closet you can read more about this revamp here

Living Room. Look at those floors!!!! Eeeeek! Bill and some very awesome Marines did this for me! I owe them a fancy shmancy man dinner!

We had to figure out a way to incorporate my sewing/crafting table into this space. It was a little tricky but I'm pleased with the outcome. 

Looking down the hallway to the bedrooms

Turning the other direction and looking down the hallway to the kitchen. Don't you love the wall track? Excellent decor choice ;)

Left side of the living room and a very cute 4 year old :)

Dining Room! I'm so loving the new flooring!


Kitchen

Kitchen looking into the living room


Guest room


Guest room looking into the hallway

Guest/hall bath

Entryway

Master not finished! The plan: Neutral bedding, Annie Sloan Chalk Paint on all furniture, new curtains and a reclaimed wood headboard. Lots to do in here!


Master Bath, so tiny!

Boys Room


So there you have it! It's been a very busy 6 months but there is a tiny light at the end of the tunnel and once the master bedroom is done I'm putting my feet up and calling it finished for this house! I'm sure Bill is writing up a binding contract at this moment ;)

Pssst....the giveaway....