(Skully Cupcakey Goodness)
And in case anyone is wondering the cupcakes I made came from this recipe: Guinness Chocolate Cupcake with Bailey's Cream Cheese Frosting
Anyway, onwards to the skull making!
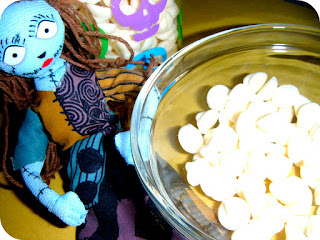
(Jack and Sally are going to be our kitchen assistants today.)
You Will Need:
- White Chocolate Chips
- Dark Chocolate Chips
- A Baking Sheet
- Wax Paper
- Spoons
- Microwave Safe Bowls
- Toothpicks
- Scissors
- Plastic Baggies
- Candies and Other Embellishments (Optional)
Step 2: Put some of the white chocolate chips into one of your microwave safe bowls.
(I filled my bowl about half way for my test run.)
(The white chocolate will probably be a little bit on the thick side but that's ok.)
Step 4: Use a spoon to fill a plastic sandwich baggie with the chocolate. Close it up and then squeeze the chocolate towards one end. To get a good number of skulls you may have to melt more chocolate and fill multiple bags so have them handy.
(This can get very messy very quickly. You may want to put down newspaper where ever you are working.)
Step 5: Cut the corner you squeezed the chocolate towards off and viola, you have a make-shift icing bag! (If you already have icing bags and/ or tips you can use those instead. I'm sure you could come up with some really cool effects.)
(Plain plastic baggies worked surprisingly well.)
Step 6: Use your make-shift (or real) icing bag to make a basic skull shape.
(Ironically, I think my first skull was the best looking one.)
Step 7: Repeat until you have the desired number of skulls. I didn't count and ended up with less skulls than cupcakes (oops).
(If you are worried about uneven texture you could smooth them with a butter knife that has been dipped in warm water or use the backs, which will dry flat, for your main design.)
Step 8: While you let your skulls dry put some of your dark chocolate chips into a microwave safe bowl.
Step 9: Microwave them until they're nice and melted. They shouldn't give you as much of a hard time as the white chocolate chips but I'd still suggest checking on them and stirring them a few times.
(The dark chocolate melts quite a bit better and is easier to work with.)
Step 10: Flip your skulls over so that you have the nice flat side then take a toothpick and coat them with dark chocolate. You don't have to do this step, I just thought it would be nice to balance the flavor of the white chocolate with some extra dark chocolate on the backs of the skulls.
(Messy, messy, messy...)
Step11: After letting your skulls dry again, flip them back over so you can start working on the details. I started by using a toothpick to create an outline of dark chocolate. It makes the white pop a little bit more.
(I made sure to cover all of the edges along the sides with dark chocolate as well.)
Step 12: Once that's done you can use a toothpick to create the face. There are a bunch of different ways you can do this. You can even incorporate candy, different colored icing, sprinkles, and pretty much anything you can think of.
(I was going to add M&Ms for the eyes but I liked the way they looked like this so I left them alone.)
Step 13: Either serve your chocolates as they are, use them to top some cupcakes, or do something else creative with them.
(Hurrah for cupcakes!)
(Yay!)
You can find a printable version of this tutorial here.


0 comments:
Post a Comment