Supplies: (to make 1 jar)
10 inch square of fabric
10 inch square of light interfacing
Stuffing material
8oz Mason Jar
Embroidery thread
Hot glue gun
5 inch circle template
With your fabric, trace a rough 6 inch circle as well as
two small circles the size of the lid. Cut out and set aside.
Cut a 5 inch circle and a lid circle out of the interfacing. When cutting make the lid circle slightly smaller.
Iron on the interfacing to the large circle and one of the small lid circles.
With your embroidery thread make a running stitch all the way around the edge of the large circle
Pull the thread to start forming a bubble. Dont knot or tie off the thread yet.
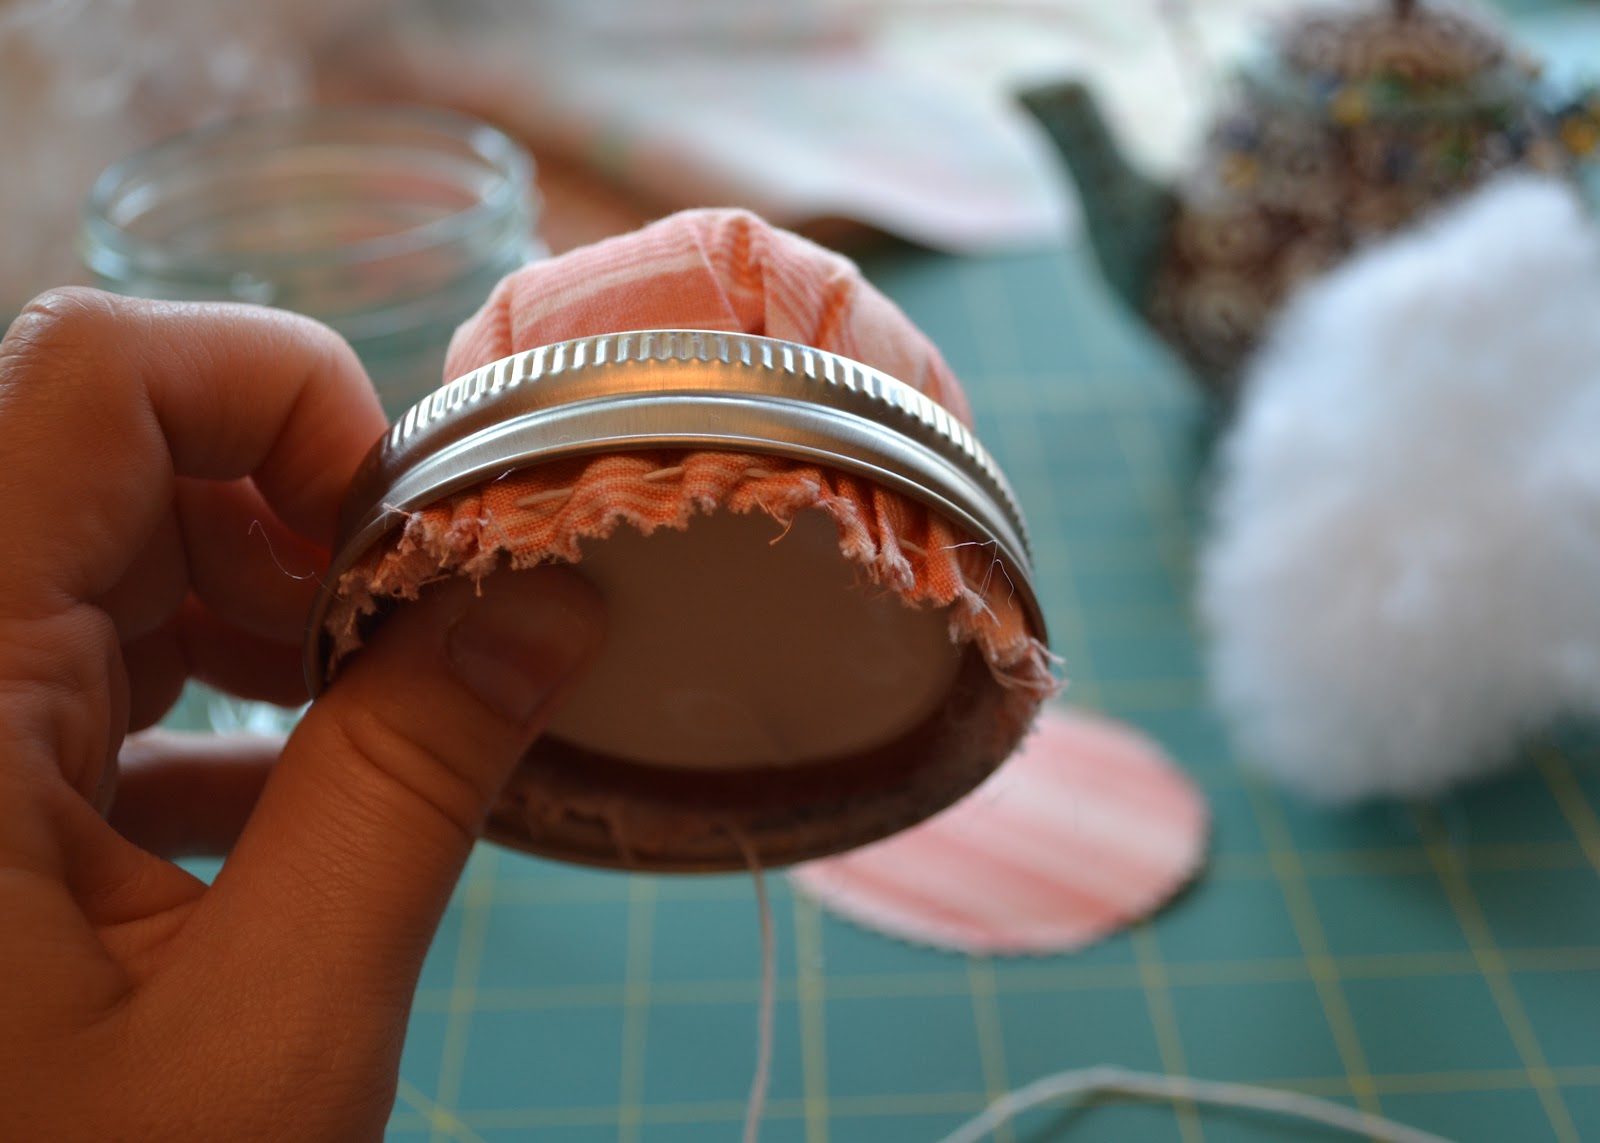
With the bottom of the lid facing up, push your bubble of fabric through the lid. Bend the fabric over the edge, pulling the thread snuggly so that it is a tight fit. This will help hold the fabric in place while your stuffing.
Fill with your stuffing, taking care not overfill. If you do the lid won't twist shut on the jar.
Take the metal lid and place it on the inside and snap into place.
Pull on your embroidery thread to close up around the lid. At this point you can test it on your jar to make sure it closes. If it does, knot the thread and snip off remaining. If it doesn't, pop out the lid and remove a bit of the stuffing, repeating the steps above.
Take your hot glue gun and trace a line of glue around the edge of your second small circle, about a 1/4 inch in from the the edge and place on the underside of the jar.
Ta-da! Fill them with little scissors, thread, measuring tapes and pins! A perfect handmade gift! I made a set for
teacher gifts and they were a huge hit. Happy crafting!


0 comments:
Post a Comment